


If you are a Windows user and now switch to Mac, of course you are surprised about how to screenshot on Mac. The Mac does not have a PrtScr button as on the Windows keyboard. But don’t worry, there are always ways and methods that can be used to upload screenshots.
There are many ways that you can use to take screenshots of the MacOS screen even you can take screens specifically. You can do it, whether you still use the High Sierra or have switched to Mojave. Here’s how to screenshots on Mac.
Using Keyboard Commands
With MacOS keyboard commands is the easiest way to take screenshots on a Mac. Using the keyboard, you can take screenshots in whole or only for certain parts of the Mac screen. In this case, the important thing is that your keyboard is not jammed.
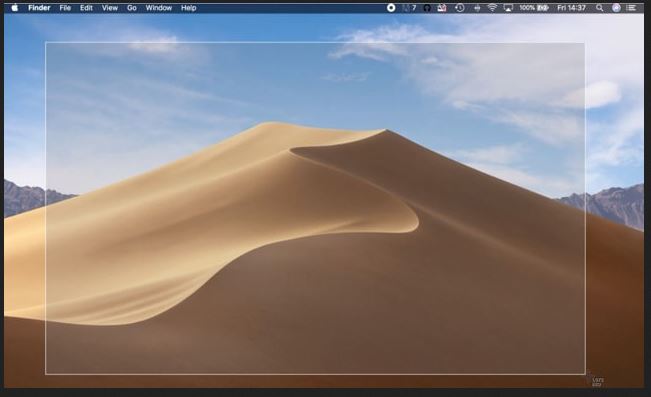
1. Take a screenshot for an entire screen
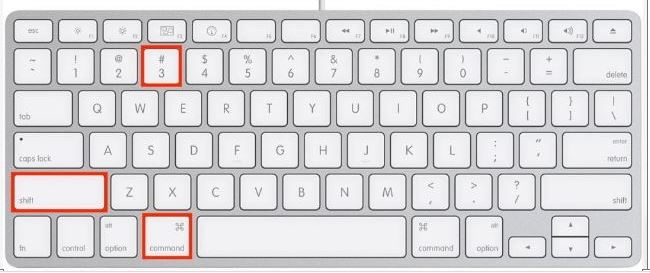
The first step, press the “command” + “shift” and “3” buttons simultaneously.
Second, by pressing the button the copy of the screenshot will be saved on the clipboard. In addition to using these key combinations, you can also press a few of the buttons above without pressing the “Command” button, this is so that the screenshot (screenshot) of the mac is directly saved on Desktop in PNG format.
Also read: How to Lock an iPhone App
If your Mac has been updated to the latest version that known as Mojave, then you can easily see the preview of the screenshot results in the corner of the screen. This makes it easy for you to directly access it using the editing tool. With a new Mac, you can also use a feature called “Stacks”. This feature will group files based on the same file. It’s very easy, you just need to right-click on the desktop of your Mac.
2. Take screenshots of selected screens
Earlier how to take screenshots for the entire screen. If you want to take screenshots of certain areas of the screen, you can use the following commands on your keyboard.

Step 1: Press “command” + “Shift” + “4” simultaneously.
Step 2: Your mouse will change like a crosshair, now you can select certain parts that you want to capture. It’s easy, isn’t it!
Step 3: If you want the selection process to be more perfect, you can press the space button.
Your screenshot results will be saved in the clipboard. But if you want your selection in PNG format, then you don’t need to press the “command” button, and the results will be saved on Desktop in PNG format.
More: How to Screenshot on ASUS Windows 10 Laptop
More: How to Delete All Photos from iPhone Quickly
Taking Screenshot Using Grab
Difficult for memorizing shortcuts on your Mac keyboard. You can use the Grab program. All types of Mac have been installed with this program. Using Grab, you can directly make screenshots of the menu bar. Grab allows you to take time-delayed screenshots. This is for you who need settings before starting the screenshot.
The first step:
To start, open Grab from the “Utilities” folder in the “Application” folder. Later you will see the program icon in your Dock. Later, you can create a shortcut or “pin” this icon for quick access.
Grab runs almost entirely from the Bar menu. So, this program doesn’t display a window when it’s opened.
Second step:
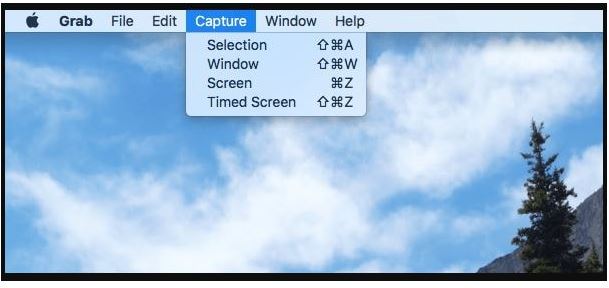
You can use the system Capture menu to take screenshots or use the keyboard shortcuts.
Timed screenshots
By using the Grab program, you can take screenshots of certain parts, capture the entire screen or individual windows. So, these three types of options are the same as we explained above. But here are different, this is the “Timed screen” option. This feature gives you time for 10 seconds before the screenshot starts.

This 10-second time aims to provide an opportunity for you, sometimes needing to shift the mouse or open the menu before the screenshot starts.
(also see: iPhone 5s Home Button Not Working – 5 Ways on How To Fix It)
First:
Open the Grab application as we explained above
Second:
Select “Timed Screenshot” from the Grab menu. Alternatively, you can press this command “Command” + “Shift” + “Z.”
By default, your mouse cursor will not appear in the screenshot. If you want to make sure that the screen has been captured, click “Preferences” from the Grab main menu. Then you select the mouse icon in the “pop-up window” result.
Using Preview to Screenshot
This is a tool that by default allows you to open anything like photos, pdf, etc. on your Mac. You can also edit the image with the “Preview” tool. For fast, click on the toolbox icon, this photo is not only able to open files as we mentioned but can also be used to take screenshots. Here’s how to take a screen with Preview.
Step 1: Open Preview.
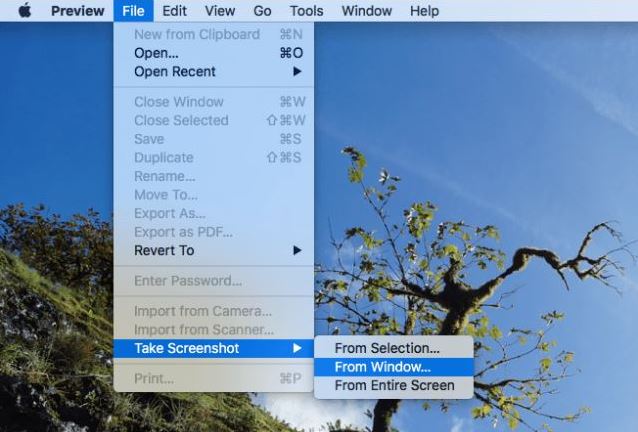
The Step 2: Go to “File” located on the menu bar.
Step 3: Then, from the drop-down menu several menus will appear, select “Take Screenshot”. You can choose to take a screenshot with “From Selection,” “From Window,” or “From Entire Screen,”. This is according to your wishes.
What do you think about how to screenshot on Mac? Which method do you prefer? In our opinion, the shortcut method by pressing the button on the remote keyboard is easier than this method because the first method is very fast.
More: How to Boot in Safe Mode Windows 8
More: How to Download Instagram Photos
However, using Preview has its own advantages. You can save files wherever you want and you can edit the results of the screenshot before you save it where you want.
While using a method other than Preview, the screenshot results will be saved automatically on the Desktop screen with a verbose filename.


